
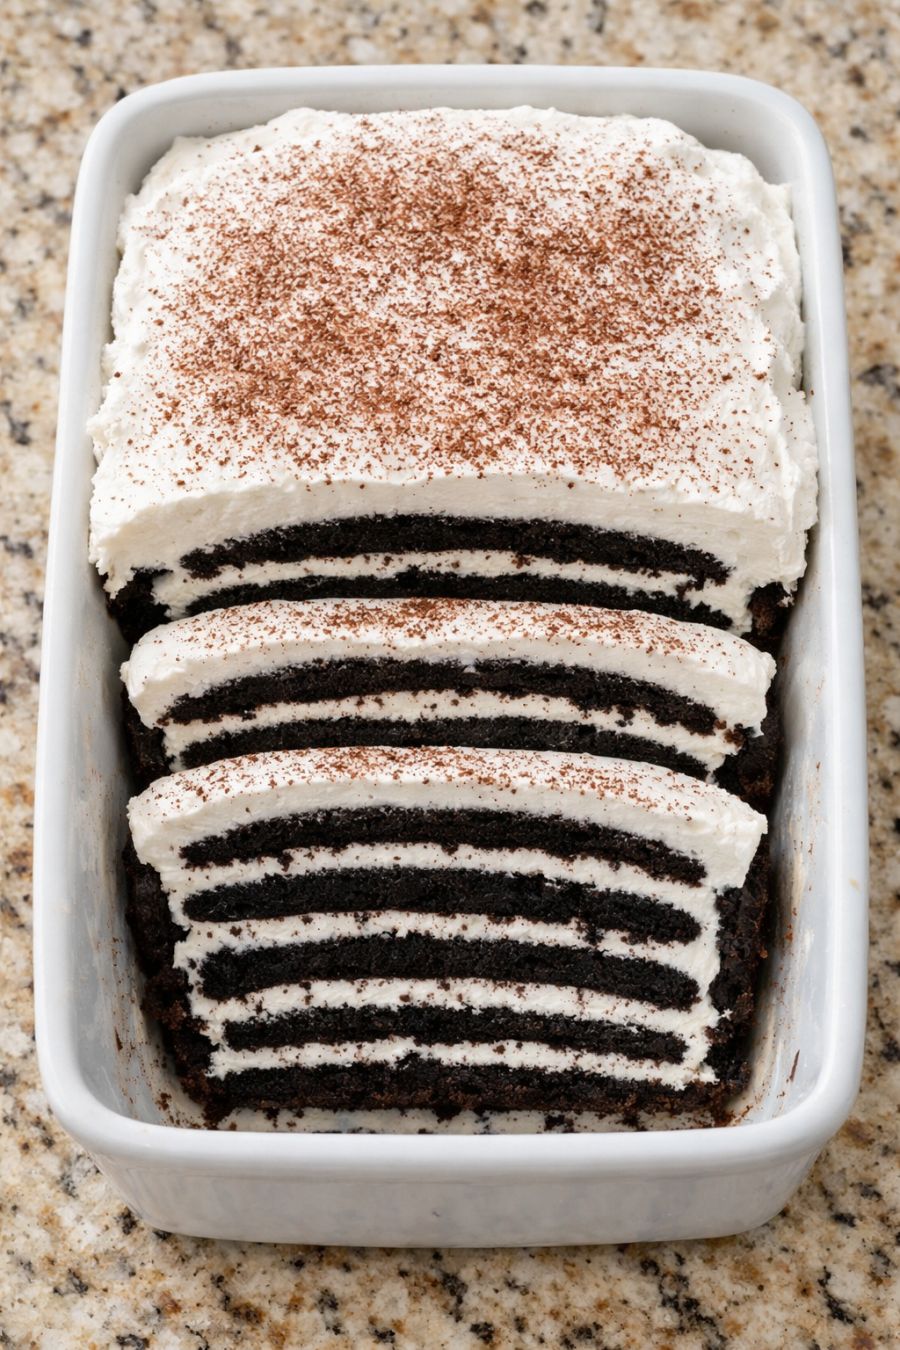
This is Aunt Linda’s chocolate icebox cake, the one she hauls to every church potluck and small-town reunion. It’s built on simple grocery-store finds: crisp chocolate wafer cookies, a big bowl of whipped topping, and a little cocoa to deepen the chocolate flavor. The magic happens in the refrigerator—those dark cookies soften into neat, sliceable layers under a thick, snowy top. It comes together in minutes, looks like you fussed, and disappears faster than anything else on the dessert table. Around here, Linda swears this is the fastest way to win a potluck—slice it cold and you can just watch folks hover for seconds.
Serve this icebox cake well-chilled, sliced straight from the ceramic loaf pan so you can show off the layers. A pot of hot coffee or strong tea is perfect alongside, especially after a big Midwestern spread of casseroles and salads. In summer, a few fresh berries on the side brighten the plate, and in winter, a drizzle of warm chocolate sauce makes it feel extra cozy. Keep the slices modest; people almost always come back for another sliver.
Aunt Linda’s Chocolate Icebox Cake
Servings: 8-10
Ingredients
1 (9-ounce) package thin chocolate wafer cookies
3 cups frozen whipped topping, thawed (such as Cool Whip), divided
2 tablespoons unsweetened cocoa powder, plus more for dusting
2 tablespoons powdered sugar
1 teaspoon vanilla extract
Pinch of salt
Nonstick cooking spray or a little neutral oil (for the pan)
Optional: 1–2 tablespoons milk or cream, if needed to loosen the cocoa mixture
Directions
Lightly grease a ceramic loaf pan (about 8 1/2 x 4 1/2 inches) with nonstick spray or a thin wipe of neutral oil. Line it with a long strip of parchment paper, leaving overhang on the long sides to help lift the cake later. Set aside on a clean, speckled countertop or other sturdy surface.
In a medium bowl, stir together 1 cup of the whipped topping, the unsweetened cocoa powder, powdered sugar, vanilla extract, and a pinch of salt. Mix until smooth and evenly chocolatey. If the mixture seems too stiff to spread easily, add 1–2 tablespoons of milk or cream, a little at a time, until it’s soft and spreadable.
In a separate larger bowl, gently fold the remaining 2 cups of whipped topping just to loosen it so it’s easy to spread. This will be your main filling and top layer.
Spread a very thin layer of plain whipped topping over the bottom of the loaf pan. This helps the first cookie layer stay put and creates a neat base.
Lay a single layer of chocolate wafer cookies over the whipped topping, breaking a few cookies as needed so they fit snugly in the pan. Try to cover as much surface as you can without big gaps.
Spread a generous layer of plain whipped topping (about 1/2 cup) over the cookies, smoothing it gently with the back of a spoon or an offset spatula. You don’t need perfection, just even coverage.
Add another layer of chocolate wafer cookies on top of the whipped topping, again fitting them snugly. Repeat the process of alternating layers of cookies and whipped topping until you reach about 1/2 inch below the top of the pan. Finish with a cookie layer if you can, pressing lightly so the stack settles.
Spread the chocolate-cocoa whipped topping mixture over the final cookie layer, smoothing it into an even, chocolatey blanket. This will create a darker band just under the final white top.
Finish with a thick, fluffy layer of the remaining plain whipped topping, mounding it slightly in the center and smoothing the surface. The top should look like a soft, snowy cap over the dark cookie layers.
Using a small fine-mesh strainer or sifter, dust a light veil of cocoa powder over the top. Aim for a gentle, even sprinkle rather than heavy patches—it should look softly speckled, not buried.
Cover the loaf pan tightly with plastic wrap or foil. Refrigerate for at least 6 hours, but preferably overnight. During this time, the chocolate wafer cookies will soften and turn cake-like, and the layers will firm up for clean slicing.
