
Russian sage (Perovskia atriplicifolia) is a hardy perennial that captures the imagination with its silvery, aromatic foliage and delicate spikes of lavender-blue flowers. This tough yet beautiful plant thrives in sunny, well-drained locations and is highly resilient to drought and pests.
As spring arrives, it’s time to start thinking about how to best care for your Russian sage to ensure it reaches its full potential. With a few intentional tasks, you can transform your Russian sage into a stunning silvery blue cloud that will be the pride of your garden. Here are 10 urgent spring tasks to help you get started.
1. Cut Back Last Year’s Woody Stems To Wake Up Fresh Growth
Start by removing the old, woody stems that were left standing over the winter. This encourages new growth to emerge vigorously as the weather warms. Use sharp pruning shears and cut back the stems to about 10-12 inches from the ground. Be careful not to damage the new growth already emerging from the base.
Cutting back the old growth allows sunlight to reach the base of the plant, promoting healthy new shoots. This practice not only keeps your Russian sage looking tidy but also stimulates a fuller, more robust plant.
2. Divide Or Relocate Overgrown Clumps For A Fuller Drift Of Color
If your Russian sage has become too crowded or is not blooming as prolifically, consider dividing or relocating it. Early spring is an excellent time for this task, as the plant is just beginning to break dormancy.
Carefully dig up the clump, using a sharp spade to divide it into sections, ensuring each section has roots and shoots. Replant the divisions at the same depth they were growing before, spacing them 18 to 24 inches apart to allow for air circulation and growth. This will help rejuvenate the plant and create a more impressive display.
3. Loosen And Enrich The Soil So Roots Can Explode With New Growth
Russian sage thrives in well-drained soil. To give your plant the best start in spring, loosen the soil around the base of the plant using a garden fork. Be gentle to avoid damaging the roots.
Work in some organic matter, like compost or well-rotted manure, to improve soil fertility and drainage. This will provide the necessary nutrients for vigorous root and shoot development, ensuring your Russian sage grows lush and healthy throughout the season.
4. Prune Strategically To Shape An Airy, Cloud-Like Silhouette
For an attractive, airy appearance, prune your Russian sage strategically. Focus on removing any dead or damaged stems, and thin out crowded growth to improve air circulation.
Aim to create an open, cloud-like silhouette by selectively pruning stems to different lengths, encouraging a natural shape. This will enhance the plant’s graceful form and ensure it doesn’t become too leggy.
5. Feed Lightly And Water Deeply To Fuel Silvery Blue Foliage
Russian sage doesn’t require much fertilizer, but a light feeding in spring can support healthy growth. Use a balanced, slow-release fertilizer, applying it according to package instructions.
Make sure to water deeply but infrequently, allowing the soil to dry out between waterings. This encourages deep root growth and helps the plant develop its characteristic drought resistance.
6. Weed And Mulch Smartly So The Sage, Not The Weeds, Steal The Show
Keep the area around your Russian sage free from weeds, which compete for nutrients and water. Hand-pull weeds or use a hoe to carefully remove them, being cautious not to disturb the sage’s roots.
Apply a layer of mulch, such as shredded bark or gravel, around the base of the plant. This helps retain soil moisture, suppress weeds, and enhance the aesthetic appeal of your garden.
7. Pair With Spring Companions That Make The Silvery Blue Pop
Enhance the visual impact of your Russian sage by pairing it with complementary plants. Consider planting it alongside other drought-tolerant perennials like lavender, yarrow, or echinacea.
The contrasting colors and textures will make the silvery blue foliage of the Russian sage stand out even more, creating a dynamic and eye-catching garden display.
8. Stake Or Support Early To Prevent Flopping Later
Russian sage can sometimes become floppy, especially if grown in rich soil or shaded conditions. To prevent this, stake or support your plants early in the season.
Use bamboo stakes or decorative plant supports, placing them around the plant’s perimeter. As the plant grows, gently tie the stems to the supports with soft twine or plant ties, ensuring they don’t become damaged.
9. Check For Winter Damage, Pests, And Disease Before They Spread
Inspect your Russian sage for any signs of winter damage, such as cracked stems or frost-heaved roots. Prune away any damaged sections to prevent disease.
While Russian sage is generally pest-resistant, keep an eye out for aphids or spider mites. If detected, treat with insecticidal soap or neem oil. Ensure good air circulation and avoid overhead watering to minimize disease risk.
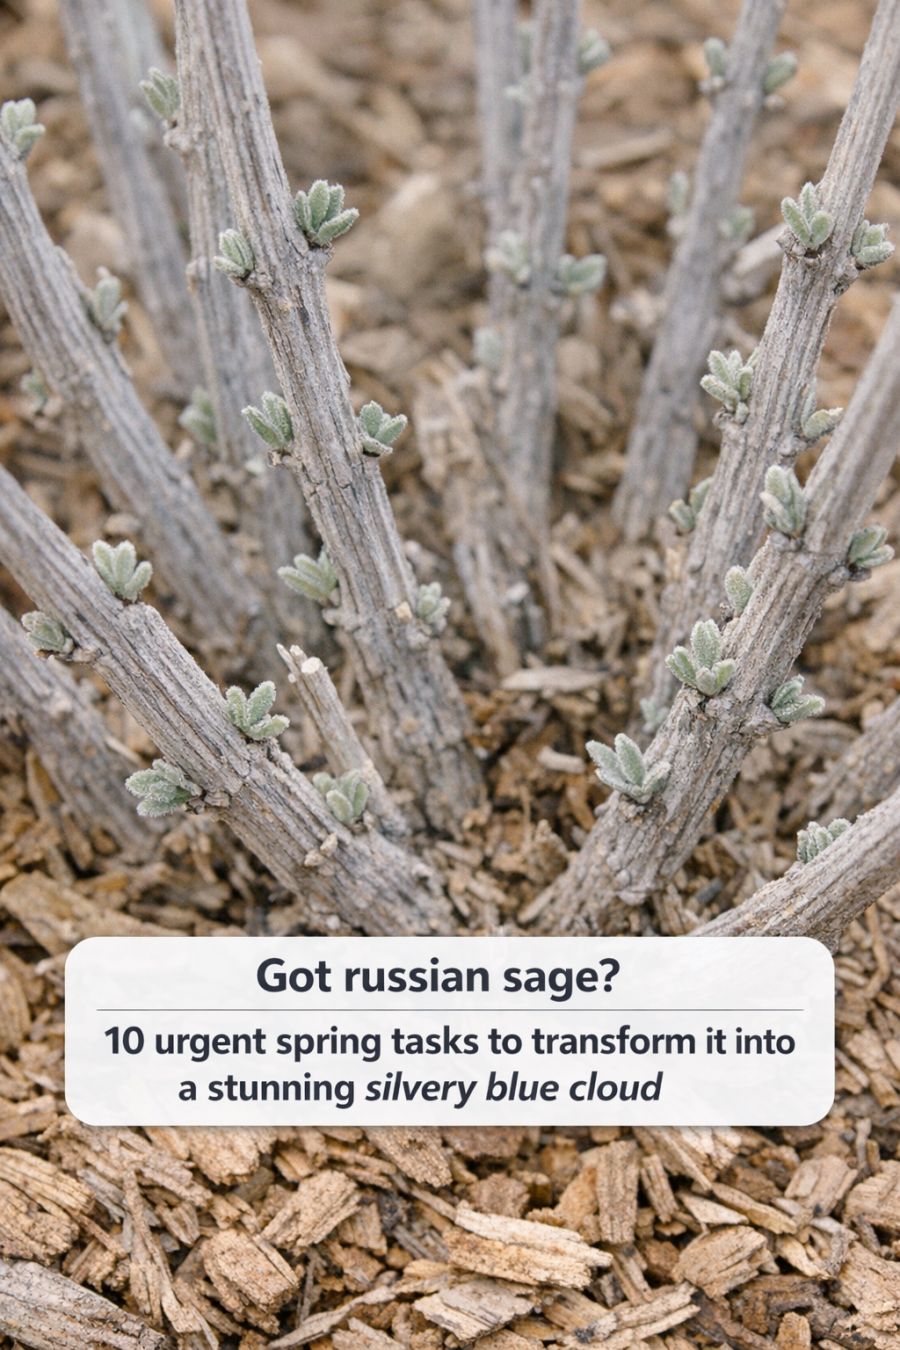
Got russian sage? 10 urgent spring tasks to transform it into a stunning silvery blue cloud
Pages: 1 2
