
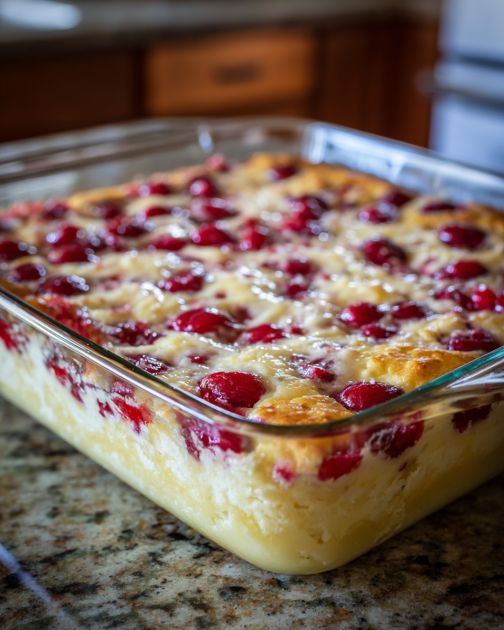
Cherry cheesecake bars feel like every church potluck and family reunion I grew up with here in the Midwest, all wrapped into one pan. They’ve got that classic creamy cheesecake layer, a buttery crust, and sweet cherry pie topping—but with only three ingredients and hardly any fuss. This is the kind of dessert you can throw together on a busy weeknight or when the kids announce at 8 p.m. that they promised to bring a treat to school tomorrow.
Baked in two glass dishes, they’re perfect for sharing: one for home and one for a neighbor, a teacher, or the next get-together. It’s simple, cozy baking that still feels special when you set it on the table.
Cherry cheesecake bars in glass baking dishes on a kitchen counter
Cherry cheesecake bars in glass baking dishes on a kitchen counter
These cherry cheesecake bars are rich and creamy, so they pair nicely with lighter sides. I like to serve them after a simple supper—think grilled chicken, a big green salad, or a pot of soup with crusty bread. For a family gathering, you can set them out alongside a fresh fruit salad or a bowl of berries to balance the sweetness.
If you’re serving coffee or tea, these bars make a lovely companion on a dessert tray, and for the kids, a cold glass of milk or hot cocoa turns this into a cozy, end-of-the-day treat. They also travel well, so you can pack them in a cooler for picnics or ball games and slice them right in the dish when you arrive.
3-Ingredient Cherry Cheesecake Bars (Two-Pan Family Style)
Servings: 24 bars
Ingredients
2 (21-ounce) cans cherry pie filling
3 (8-ounce) packages cream cheese, softened
3 (21-ounce) cans ready-made cheesecake or cream cheese pie filling (shelf-stable or refrigerated)
Cream cheese, pie filling, and cherry topping ingredients laid out on a counter
Cream cheese, pie filling, and cherry topping ingredients laid out on a counter
Directions
Prepare the pans: Lightly grease two 8×8-inch or 9×9-inch glass baking dishes (or similar-size glass dishes) with a bit of cooking spray or butter so the bars release easily when sliced.
Soften the cream cheese: Place the cream cheese bricks on the counter for about 30–45 minutes so they soften. This helps everything blend smoothly and keeps the filling nice and creamy.
Blend the cream cheese: In a large mixing bowl, beat the softened cream cheese with a hand mixer (or a sturdy whisk) until smooth and free of lumps. Take a minute to scrape down the sides of the bowl so everything is well combined.
Cream cheese being mixed in a bowl with a hand mixer
Cream cheese being mixed in a bowl with a hand mixer
Add the cheesecake pie filling: Pour the ready-made cheesecake or cream cheese pie filling into the bowl with the whipped cream cheese. Beat or stir until the mixture is smooth and uniform. This is your creamy cheesecake layer.
Divide the cheesecake mixture: Evenly divide the cheesecake mixture between the two glass baking dishes. Use a spatula to spread it into an even layer, making sure to reach all the corners so each bar has a good, thick layer of filling.
Chill briefly (optional but helpful): If you have the time, place the dishes in the refrigerator for about 20–30 minutes. This helps the cheesecake layer firm up a bit so the cherries sit nicely on top.
Cheesecake filling smoothed into glass baking dishes
Cheesecake filling smoothed into glass baking dishes
Add the cherry topping: Open the cans of cherry pie filling and spoon them gently over the chilled cheesecake layer in both dishes. Spread the cherries out evenly, trying not to disturb the creamy layer underneath. Make sure every corner gets some cherries so no one ends up with a plain piece.
